
DIY Wood Bead Chandelier
- May 14, 2018
- 4 min read

I am obsessed with wood bead chandeliers, but I'm not too crazy about their price tags. For months now, I've been thinking, "Why can't I just buy a bunch of wood beads and make one myself?" So, that's exactly what I did last week as part of my front porch refresh. My inspiration for this particular chandelier came from Hollie @artfulhomestead. Here's a shot of her fixture that she has from Restoration Hardware (they don't sell it anymore).

My version is smaller, but it only cost me about $100 in materials and took me about 4 hours to make. Not bad for a beautiful light fixture.
Here are the materials I used with links:
-white spray paint
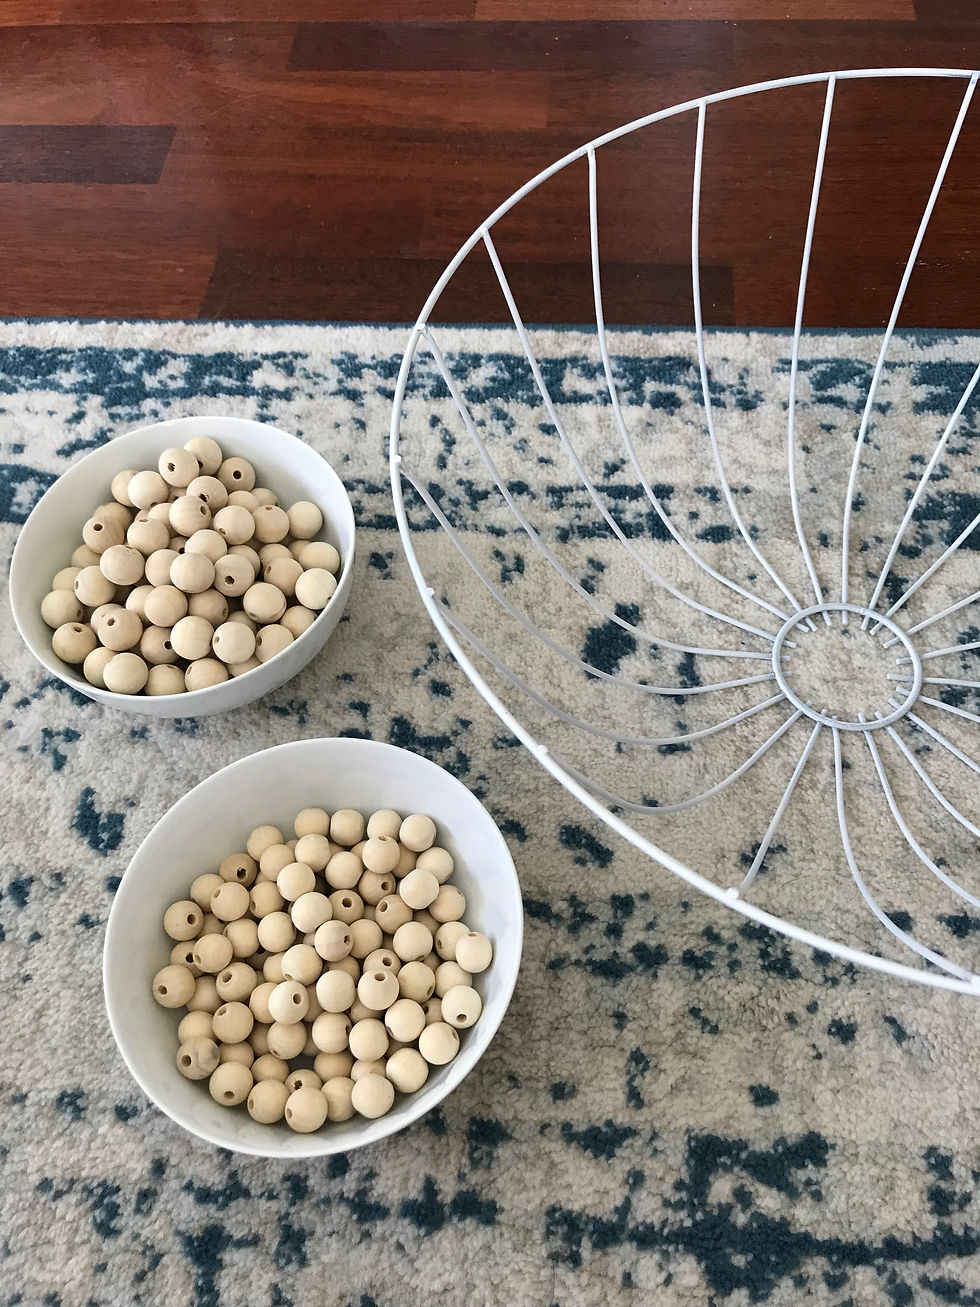
-wood beads (I used 300 20mm beads and 600 16mm beads for this basket)
-wire cutters
-hot glue and hot glue gun
-white wash pickling and paint brush

I started with a wire plant basket with a diameter of 16". I started by spray painting the basket white with spray paint I already had on hand.


After that was completely dry, it was time to start the tedious part: stringing the beads onto the basket. This definitely isn't hard, but it is time-consuming so settle in with something good to watch on tv.
Start by wrapping the end of the white wire around one of the vertical wires at the top of the basket.

Next, cut off the wire so that you have enough to go all around the base of the basket. Cut it long because you'll cut off any extra later. Now, you need to decided what pattern you want for your beads. You can do whatever you want, but I chose to go with 2 16mm beads and then 1 20mm bead.

I just kept stringing them onto the wire until I reached the starting point.

Once it wrapped all around the base, I left about an inch of wire and cut off any excess. Now the last inch of wire needs to be wrapped around the basket at the same place you started. Use hot glue to secure the wood beads to the basket. I used a small dot on each of the vertical wires so the beads wouldn't move around too much.

It's time to start the second layer. I wrapper the white wire on the next vertical wire on the basket so I wasn't always starting in the same place. Repeat the same process as before and hot glue before starting the next strand.

Here are 2 layers done for me.

Keep going until your wire basket is covered in strands of beads, making sure to hot glue as you go. Here is my chandelier with all the beads.

You could be done at this point, but I wanted mine to have a white-washed look to match the balustrade coffee table I made for the front porch. Place the chandelier on a towel or a sheet, and shake up your white wash pickling. This stuff is just basically watered down white paint. I wanted my white wash to be heavy so I didn't wipe it off after I brushed it on.

Because I did this after my beads were already on the basket, it's pretty much impossible to completely coat the beads, but I like the rustic look it created, especially since this would be an outdoor chandelier. If you want solid white, I suggest you white wash the beads before stringing them. After coating the outside, I turned the basket over so I could white wash the inside.

Once your white wash has dried, go back with a hot glue gun, and secure any spots that were loosened during the white washing. Here is my finished pendant.

Now, it's time to mount the fixture with the greatest invention of all time: an instant pendant light conversion kit from Worth Home. My light fixture was going on the porch where there was an existing recessed can light. I've converted a recessed can before into a pendant light with a hard-wired conversion kit. It wasn't hard, but this was a million times easier.

You literally just screw the kit into the recessed light like you would a light bulb. Your pendant attaches to the other end; you screw in a light bulb and you're done. That's it. It literally took me less than 2 minutes to hang this light fixture. I told you it was the greatest invention of all time.

You can adjust the cord length to anything you want up to 48" so I did that first. Then, I put the end through my light fixture and secured it on the inside with the screw on thing (I have no idea what that's called).

I screwed in the light bulb. I decided to use the same bulb that was in the recessed can to maximize the amount of light.

Now it's time to hang your light. Screw it into the recessed can.

There is a piece on the cord that you screw on to hold the canopy in place. You can see above how it's just screwed in and then I just secure the canopy.

And, that's it: gorgeous, easy DIY wood bead chandelier with no electrical wiring required!


Comments